Add bright colors, images, and texts on both the front and back of your design which flips in different directions.
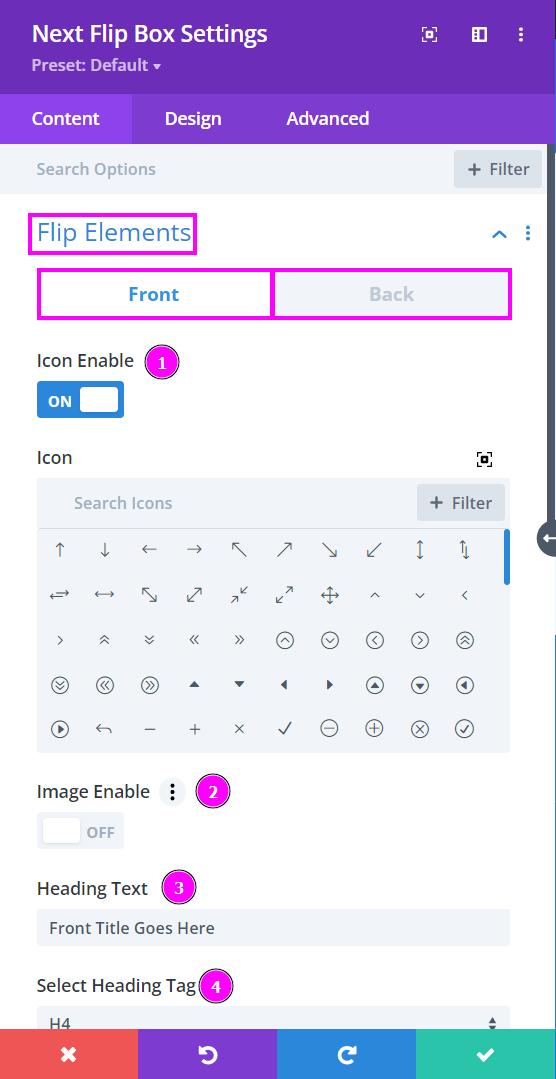
Content → Flip Elements → Front/Back
In this section, you can enable icons and images and put the text as well. You can also set alt text for SEO.
- Icon Enable – enable or disable the icon feature for both the front and back parts of the flip box design.
Image Enable – enable or disable images for both front and back parts of the flip box.
- Heading Text – Include Heading text for the front and back parts of the flip box.
- Select Heading Tag – choose Heading Tag which will define the size of the heading text.
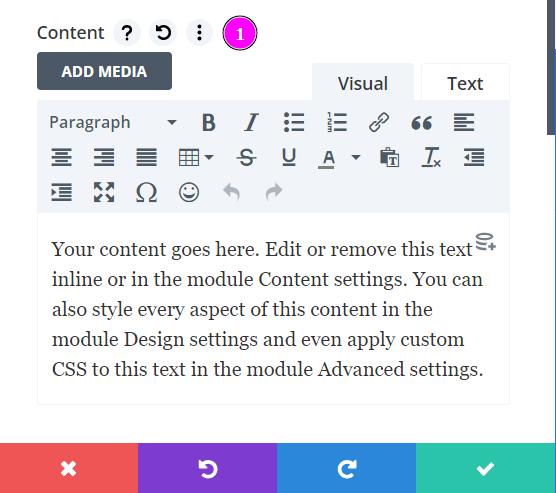
Content → Flip Elements
Content – write down the text for content. This is available for both the front and back parts of the flip box.
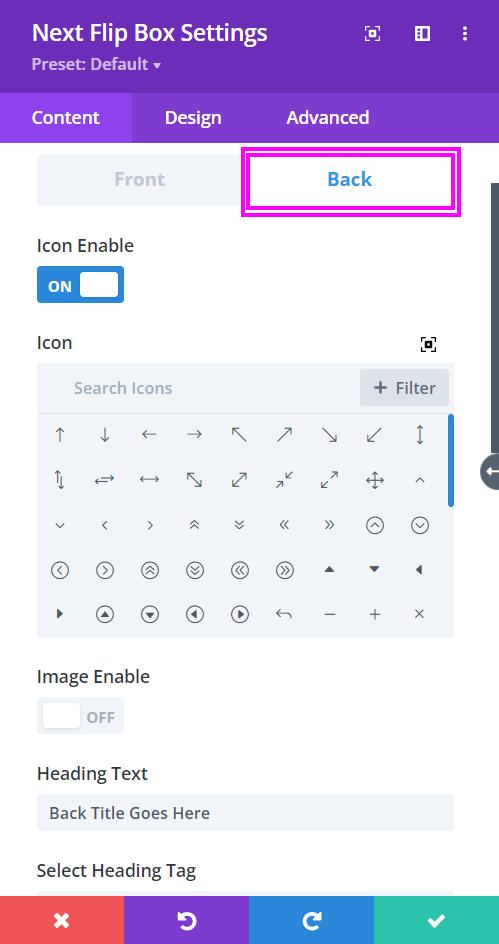
Content → Flip Elements → Back
You have exactly the same features as the Front but here, you can add a button as well.
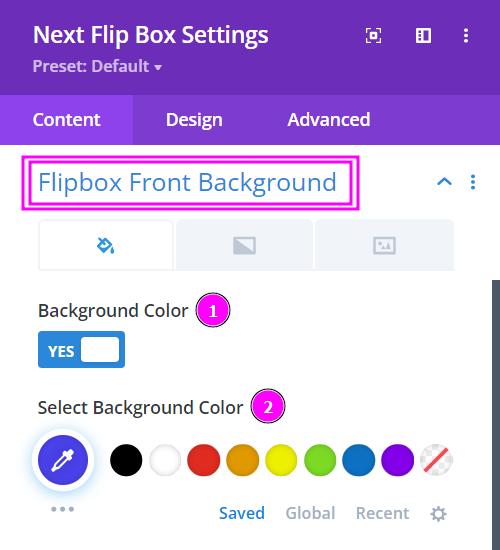
Content → Front Background
- Background Color – enable to add a background color to the front part of the flip box
- Select Background Color – pick a background color for the front part of the flip box. You can choose manually using the pointer or you can paste the hex code to get the precise color required for the design.
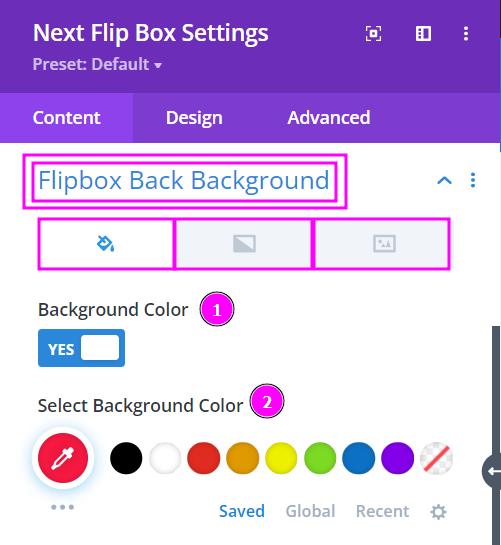
Content → Back Background
- Background Color – enable to add a background color to the back part of the flip box
- Select Background Color – pick a background color for the back part of the flip box. You can choose manually using the pointer or you can paste the hex code to get the precise color required for the design.
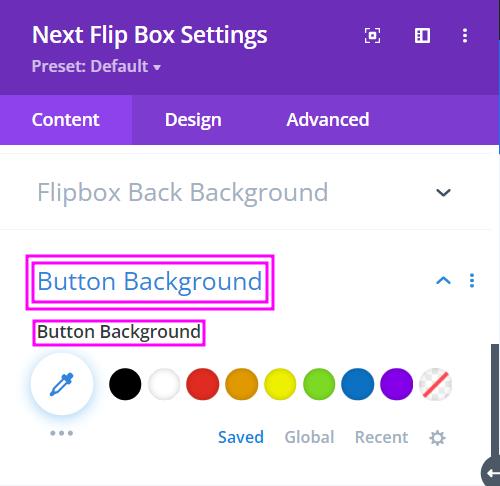
Content → Button Background
Select a background color for the button. This will respond when the button is enabled for the flip box design.
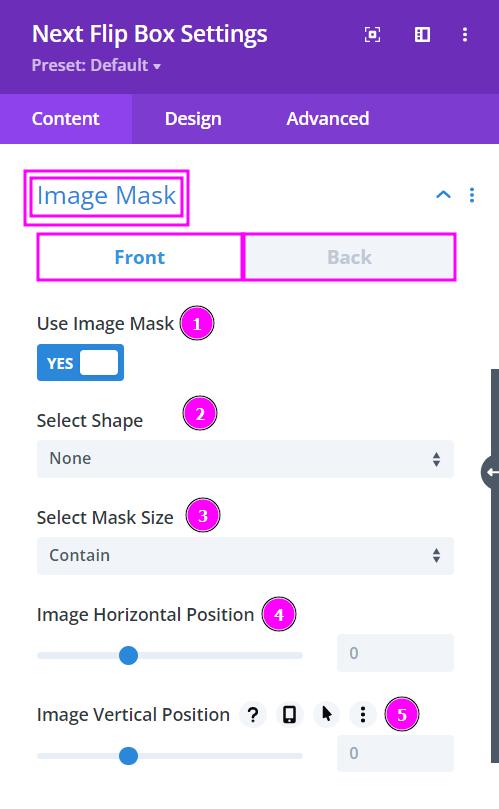
Content tab → Image Mask
When you have the image field enabled from the Flip Elements toggle, the Image Mask feature for both Front and Back will allow you to select a shape in which you can mask the image. Image mask comes with various features in itself:
- Use Image Mask – enable to view the features of Image Mask.
- Select Shape – select a prebuilt shape to mask the image into.
- Select Mask Size – there are two ways you can size the image within this field. It could either be to Contain the image or to Cover the image.
- Image Horizontal Position – this feature allows you to adjust the image’s horizontal positioning.
- Image Vertical Position – adjust the slider to arrange the image’s vertical positioning.
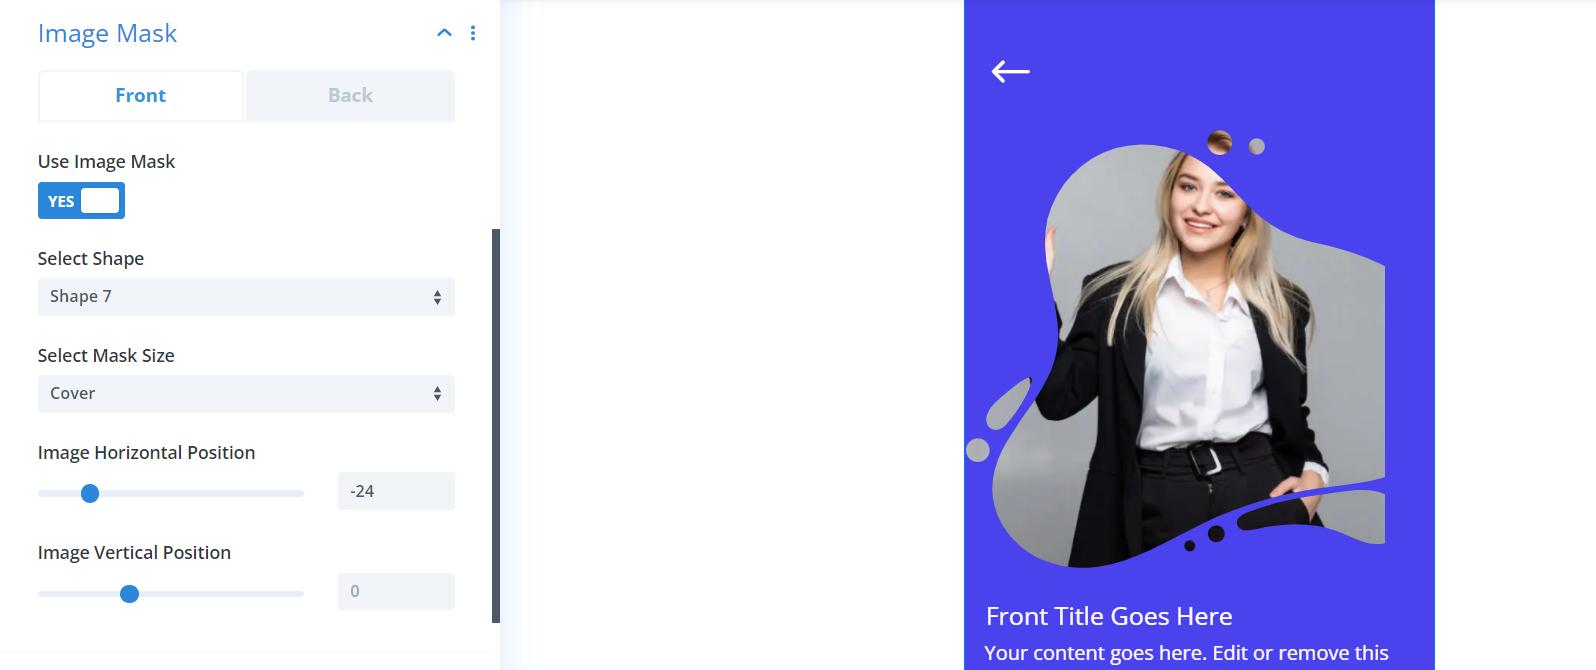
Here’s a screenshot of a demo made with the Image Mask feature:
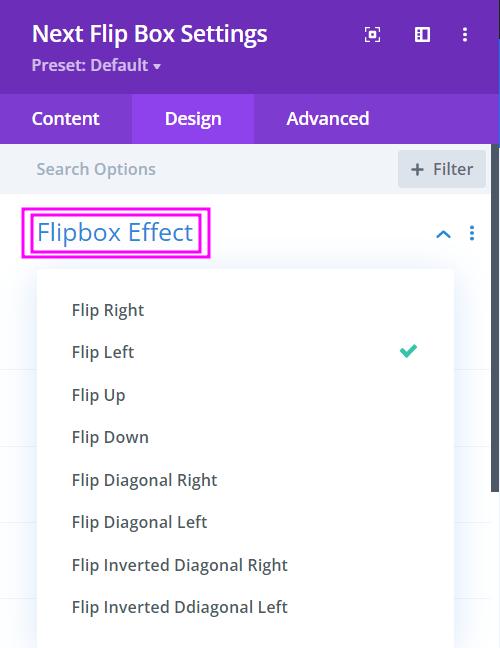
Design → Flip Box Effect
Add a variation to your Flip Box design layout with the 8 amazing flip box effects.
Design tab → Front Icon Settings/Back Icon Settings
Add rounded corners and stylize the borders! With the very simple settings provided here, you can achieve great design possibilities.
Design tab → Front Icon Settings/Back Icon Settings
Add rounded corners and stylize the borders! With the very simple settings provided here, you can achieve great design possibilities.
- Rounded Corners – adjust the corners to achieve rounded corners
- Border Styles – include a border to your design
- Border Width – adjust the width of the borders using the slider
- Border Color – select a color for the border
Design tab → Front Icon Settings/Back Icon Settings (continuation)
- Border Style – select a premade style for the border
- Box-shadow – select a boxed shadow for your design
Design tab → Icon
Stylize the icon you set up for both the front and back of the flip box.
- Icon Color – Select a color for the icon
- Icon Font Size – resize the icon for both the Front and Back of the flip box
- Icon Alignment – position the icon using the icon alignment
- Icon Background – pick a color for the background using the pointer or you can simply state the hex code and get the precise color you need.
Design → Image (Front/Back)
Here we have some minimal image settings for you. Add a background color, adjust the size of the image, and finally, align the image.
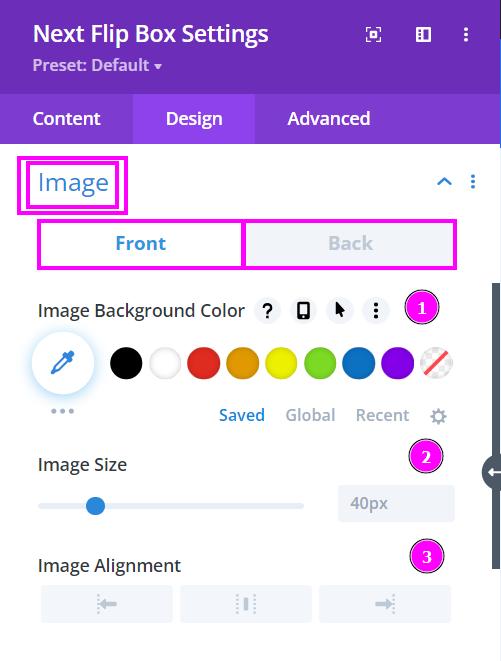
- Image Background Color – manually select a color for the background of the image using the pointer or you can simply state the hex code and get the exact color you require.
- Image Size – easily resize the image using the slider.
- Image Alignment – this allows you to position the image either to the left, right, or center.
Design tab → Title Text → Body Text
Easy title text and body text stylization are provided for both the front and back parts of the flip box design.
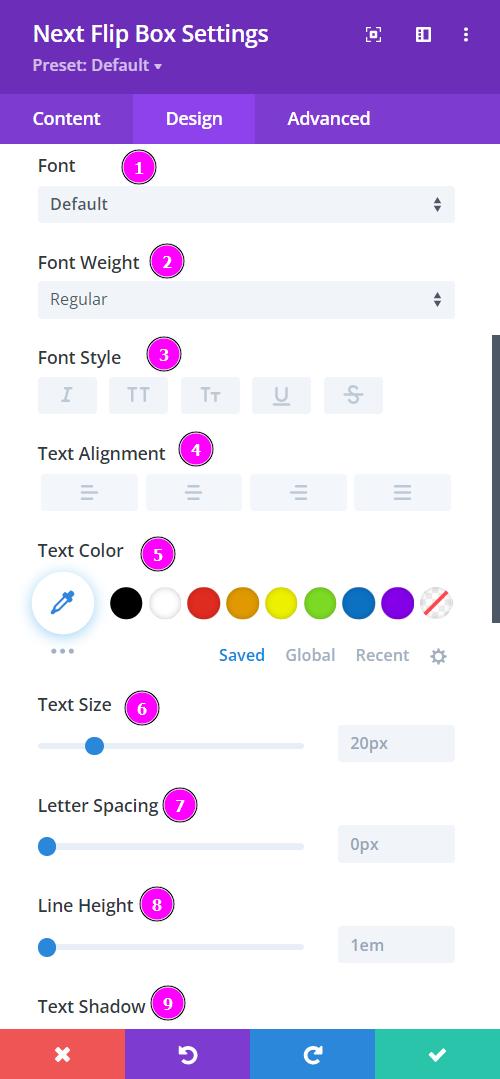
- Font – Select a font from the collection or use a custom font
- Font Weight – this is where you define how you want your font to show either regular, italic, bold extra, or even extra light.
- Font Style – Pick a style of font for both front and back
- Text Alignment – align the text for both the front and back text
- Text Color – manually select a color for the background of the text using the pointer or you can simply state the hex code and get the exact color you require.
- Text Size – easily resize the text for both the front and back parts of the flip box
- Letter Spacing – space out the letters using the slider for an easier read for the website visitors
- Line Height – easily include gaps between the lines using the slider
- Text Shadow – add text shadow to have the texts highlighted
Design tab → Button Settings
Edit the font, text color, stylize your text and adjust the alignment of the Button’s text.
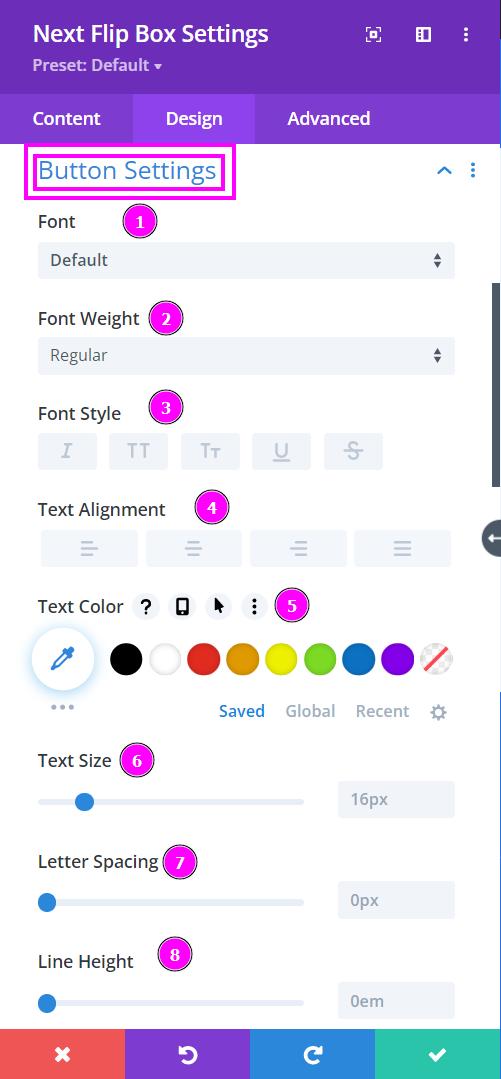
- Font – Select a font from the collection or use a custom font
- Font Weight – this is where you define how you want your font to show either regular, italic, bold extra, or even extra light.
- Font Style – Pick a style of font for both front and back
- Text Alignment – align the text for both the front and back text
- Text Color – manually select a color for the background of the text using the pointer or you can simply state the hex code and get the exact color you require.
- Text Size – easily resize the text for both the front and back parts of the flip box
- Letter Spacing – space out the letters using the slider for an easier read for the website visitors
- Line Height – easily include gaps between the lines using the slider
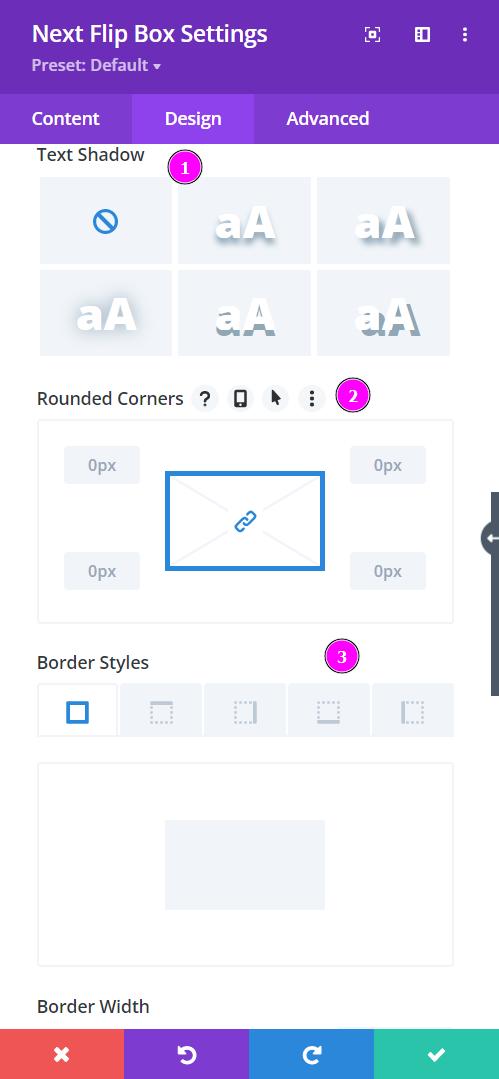
- Text Shadow – add a shadow to the text to have them pop out more so the readers can have an easier time when reading
- Rounded Corners – adjust the four corners to add rounded corners
- Border Styles – add a border to the flip box button.
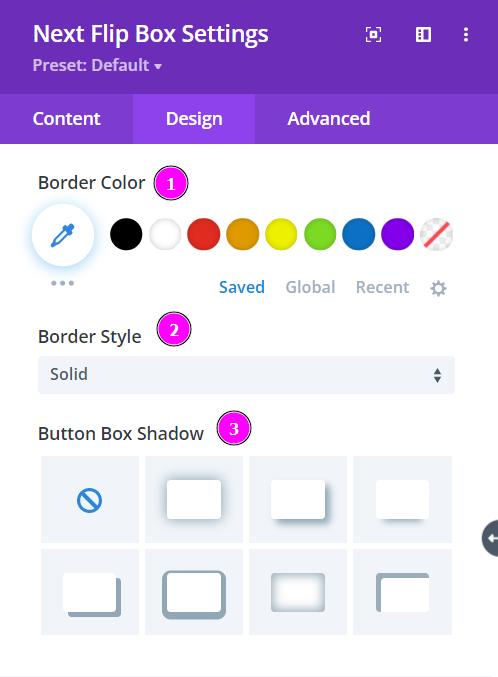
- Border Color – manually select a color for the button’s background using the pointer or you can simply state the hex code and get the exact color you require.
- Border Style – select a style of the border from the collection
- Button Box Shadow – add a box-shadow to the button


