Content
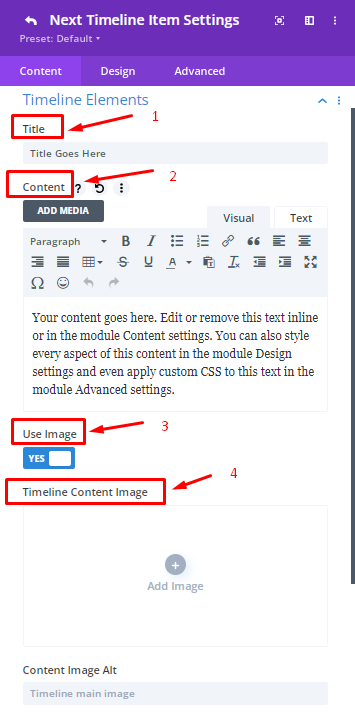
Click on Add New Timeline Item to insert the timeline item. From the Content option you can add multiple timeline items.
Content → Timeline Elements → Content
To customize your timeline item, click the settings icon which is available on the New Item. Here the Content, Design and Advanced settings for individual timeline items are available.
Title & Content: Title and Description can be the first priority to you because
your potential readers will see your article. Grabbing their attention is important in that case they will read your provided information. Use this option to show your Title and Content in the Timeline Module.
Use Image: Images can be great asset when it comes to showcasing essential information. First enable the option then use the best images that you want to showcase.
Content Image Alt: Alt tags provide information of an image what is displaying as well as alter tags inform search engine crawlers also allow them to index images properly. Use this option when you need it.

Use Icon: Select this option to choose the best icon which will fit with the Timeline module.
Identifier: Choose this option to provide the Timeline date.
Use Button: Select this option so that visitors can click on this option and they can get detailed information in another page or in a post.

Content → Timeline Elements → Design
Timeline : Stylize the Timeline background, rounded corners of Timeline, Border width, style, Box shadow by using this option.
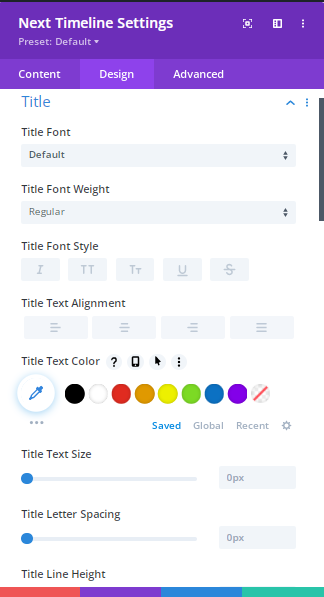
Title & Description: From here set the font, font style, color and other fonts related items as well as border designs by using this option. You can resize text for both Title and Description from here.
Image: Style your images by changing the width, change the alignment , rounded corners, border styles, width from here by selecting this option.
Button: Select this option to change the alignment, background, button font, text color of button.
ICON:
Icon Position: This option gives you the opportunity to change the icon position of your timeline.
Icon Color: Style the icon by selecting this option.
Icon Size: This feature is available in the settings so that you can easily resize the icon without any hassle.
Identifier : From here you can style the identifier so that the date of the timeline will be more magnificent.
Design
Design → Title and Description
From here set the font, font style, color and other fonts related items as well as border designs by using this option. You can resize text for both Title and Description from here.

Design → Button
Choose this option to style your button of the timeline. Button designs should be awesome so that visitors find it useful.
Design →Other Settings

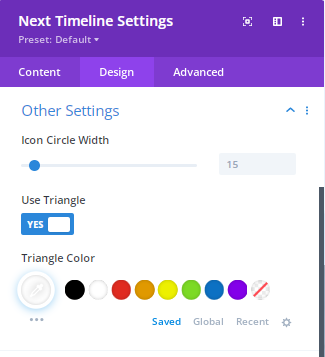
Icon circle with: Using this option you can change the circle size of the icon easily.
Use Triangle: Enable this feature and then you can indicate the specific timelines easily by using this feature.
Design → Timeline Bar
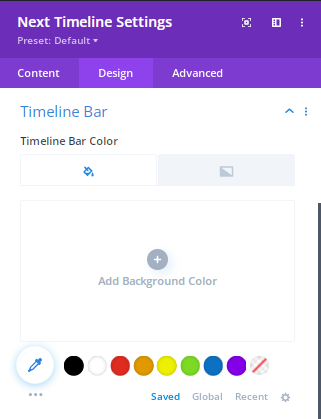
Timeline bars play an important role here. Because it sticks the other timelines in one bar. So the timeline bar color should be magnificent. From here you can set different colors.

Design → Identifier
Identifiers show the important dates and from here identifiers can be designed with the fonts, Font styles, text alignment also you can set the colors on the dates.
Design → Sizing
This design is really important for you to resize the timeline. From here you can change the width, you can set the alignment and also you can set the height.
Design → Spacing
Allocate your timelines by setting the margin and padding in your webpage to showcase in front of your visitors.
Design
Design with Next Timeline Module

Information Gathering
Your content goes heres.

Information Gathering
Your content goes heres.

Information Gathering
Your content goes heres.