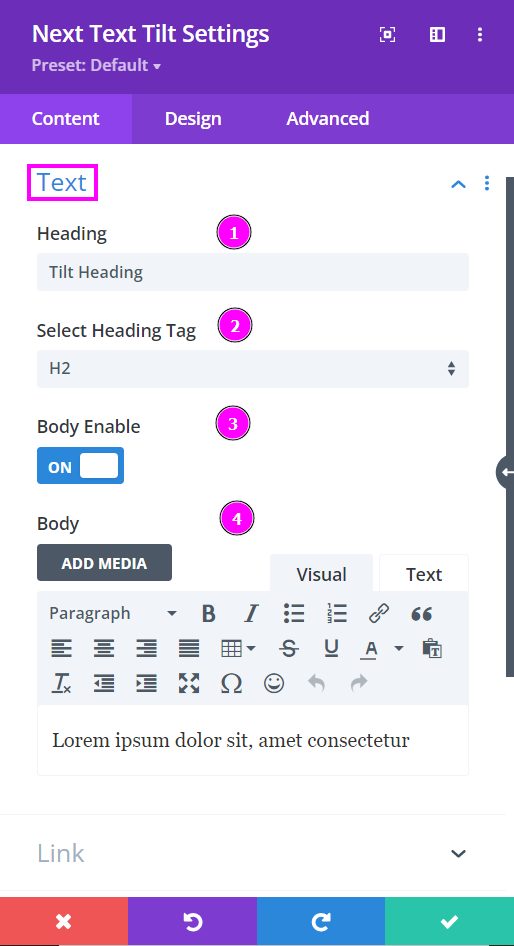
Content → Text
In the Module’s ‘Content’ tab, you will see under the toggle named ‘Text’ a field for ‘Heading’ and a ‘Select Heading Tag’ field. Move to enable the body text switch to include a summary.
- Heading – include heading text in the field below.
- Heading Tag – select a heading tag for the heading text.
- Body Enable – enabling this will display the Body Text field.
- Body – type in the body text
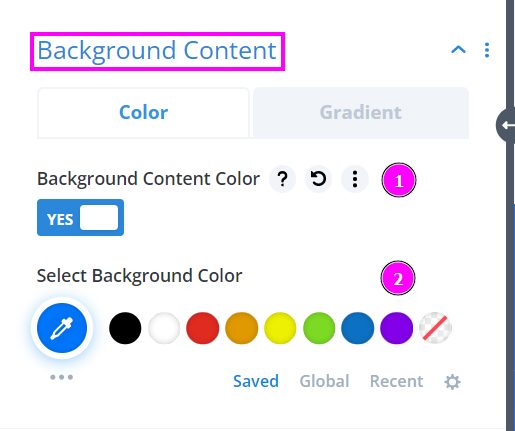
Content → Background Color
- Background Content Color – enable the switch to view the color selection tool
- Select Background Color – pick a color using the pointer or put the hex code to get the exact shade required.
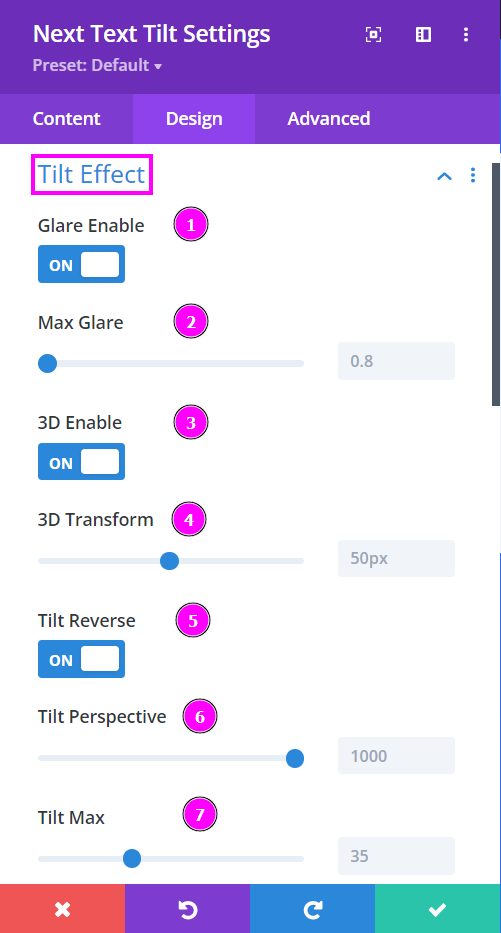
Design → Tilt Effect
Within the Module’s ‘Design’ tab, you can recreate the tilt effects with the many options to alter your text. One of the significant toggles would be the “Tilt Effect.” Here you will find various ways to edit the tilted text’s perspectives.
- Glare – add a glare to the tilt design using the slider
- Max Glare – this allows you to adjust the intensity of the glare
- 3D Enable – if you’d like to have the tilt effect have a 3D-like effect enable this switch
- 3D Transform – adjust the 3D transform using the slider
- Tilt Reverse – reverse the tilt shift (it will tilt from the opposite direction)
- Tilt Perspective – adjust the perspective if the tilt using the sider
- Tilt Max – adjust to lessen the excessive movement. Higher the value faster the tilt movement when hovered on.
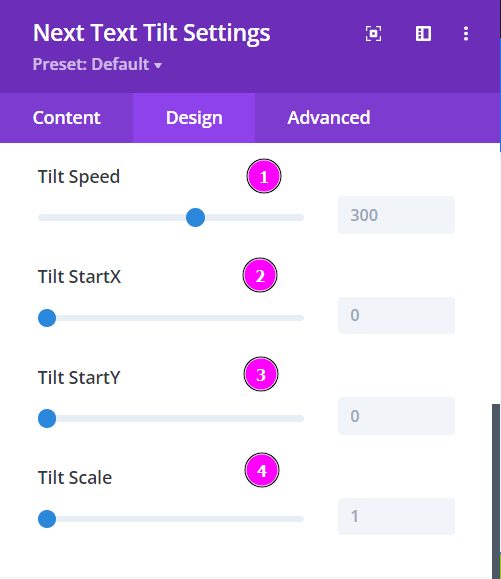
Design → Tilt Effect (continued)
Within the Module’s ‘Design’ tab, you can recreate the tilt effects with the many options to alter your text. One of the significant toggles would be the “Tilt Effect.” Here you will find various ways to edit the tilted text’s perspectives.
- Tilt Speed – adjust the speed of the tilt effect.
- Tilt StartX – adjust the vertical angle of the tilt shift.
- Tilt StartY – adjust the horizontal angle of the tilt shift.
- Tilt Scale – increase or decrease the scale of the text using the slider.
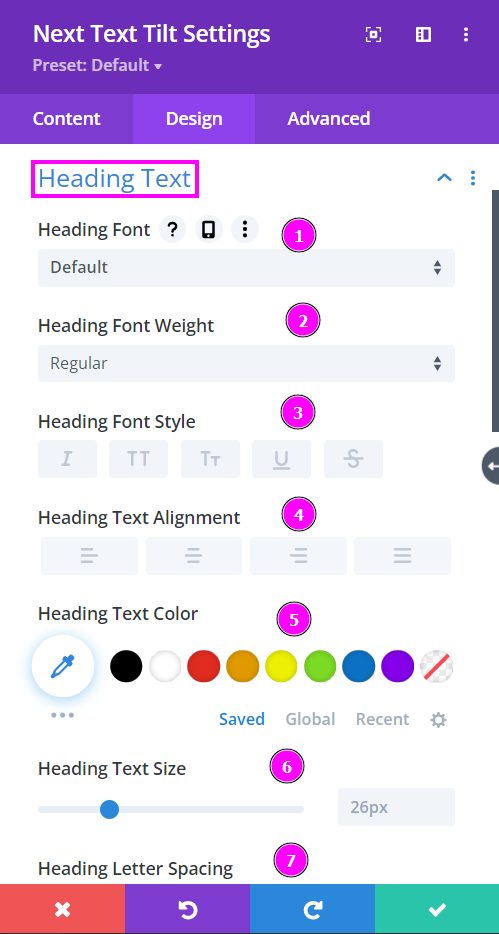
Design → Heading Text
- Font – Select a font from the collection or use a custom font.
- Font Weight – define how you want your font to show either regular, italic, bold extra, or even extra light.
- Font Style – Pick a style of font for both front and back.
- Text Alignment – align the text to the left, center, or right.
- Text Color – manually select a color for the background of the text using the pointer, or you can state the hex code and get the exact color you require.
- Text Size – easily resize the text for both the front and back parts of the flip box.
- Letter Spacing – you can space out the letters using the slider for an easier read for the website visitors.
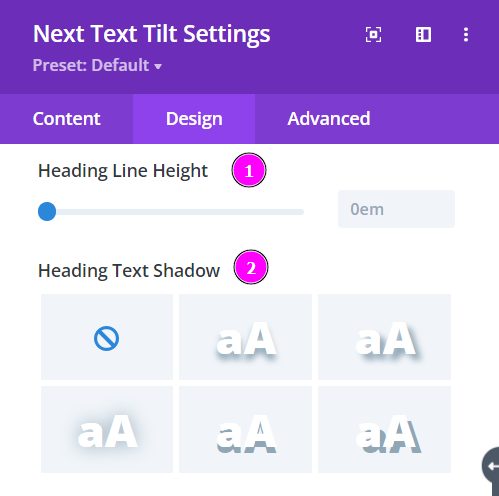
Design → Heading Text (continued)
- Line Height – adjust the space between the lines using the slider.
- Text Shadow – add text shadow to have the texts highlighted.
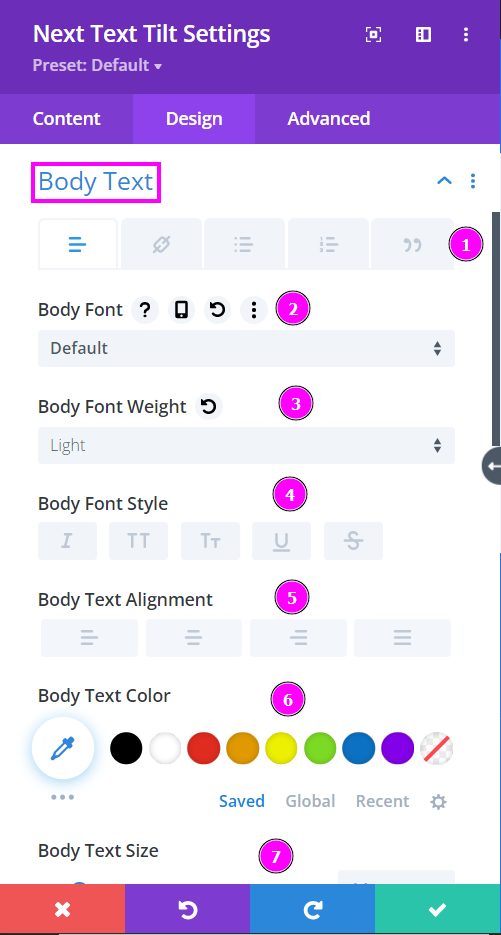
Design → Body Text
- Include text, links, bullet points, numbered lists, or quotes.
- Font – Select a font from the collection or use a custom font.
- Font Weight – define how you want your font to show either regular, italic, bold extra, or even extra light.
- Font Style – Pick a style of font for both front and back.
- Text Alignment – align the text to the left, center, or right.
- Text Color – manually select a color for the background of the text using the pointer, or you can state the hex code and get the exact color you require.
- Text Size – easily resize the text for both the front and back parts of the flip box.
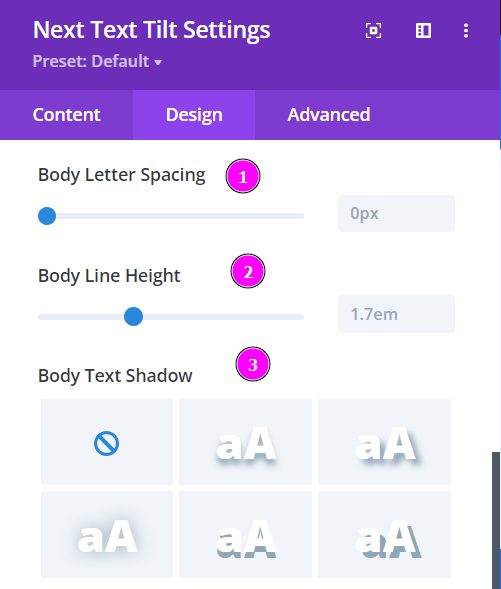
Design → Body Text (continued)
- Letter Spacing – you can space out the letters using the slider for an easier read for the website visitors.
- Line Height – adjust the space between the lines using the slider.
- Text Shadow – add text shadow to have the texts highlighted.
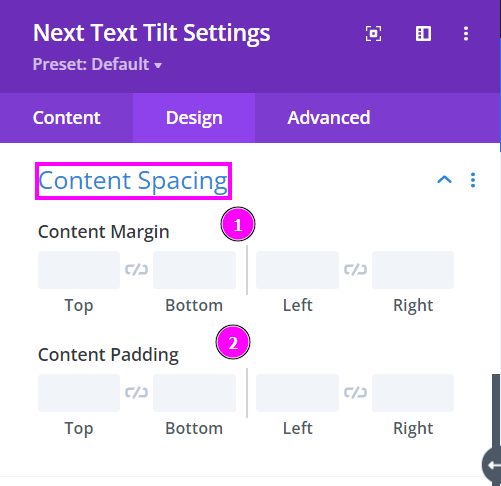
Design → Content Spacing
- Content Margin – a margin is a space around an element’s border
- Content Padding – padding is the space between an element’s edge and the element’s content
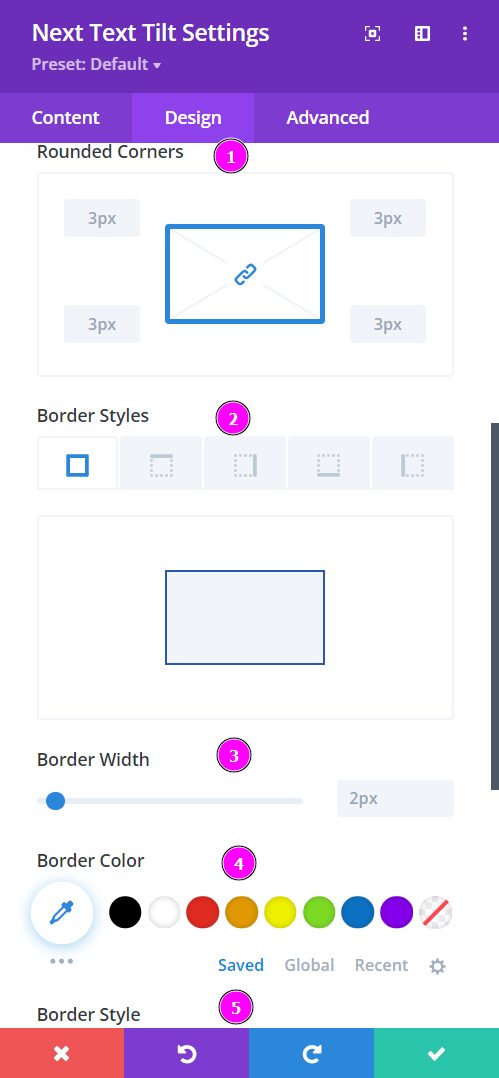
Design → Content Border
- Rounded Corners – include rounded corners around the edges of the tilt text.
- Border Styles – add borders on all four sides or specific sides using border styles.
- Border Width – adjust the border width using the slider.
- Border Color – add color to the border using the pointer or place the hex code to get the exact color you want for the design.
- Border Style – select a premade border style.
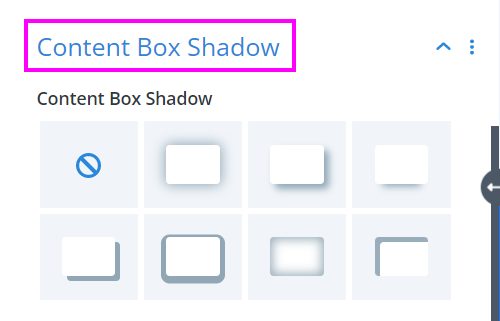
Design → Content Box Shadow
Include content box shadow to the tilt text design. You pick a premade shadow and configure the positions, blur, and intensity of the shadow.
