The “Custom Attributes” Extension is a part of the Divi Essential plugin and has been integrated to offer users enhanced flexibility. This extension allows the addition of custom attributes to modules and sections, enabling more tailored and precise customization of Divi layouts.
The “Custom Attributes” extension allows you to seamlessly add custom HTML attributes to various elements within your Divi layouts. Whether you need to add attributes to the wrapper of a section, row, column, module, or button, this extension provides the flexibility and control you need.
To know more about the “Attribute” and how to use them, you may follow the below links;
https://developer.mozilla.org/en-US/docs/Web/HTML/Attributes
https://www.w3schools.com/tags/ref_attributes.asp
Key Benefits of the Custom Attributes Extension:
✅ Customization: Easily add specific HTML attributes to your Divi elements.
✅ SEO & Accessibility: Improve your website’s SEO and accessibility.
✅ Control: Gain more control over element behavior and styling.
✅ Integration: Works seamlessly with the Divi Builder.
✅ Versatility: Apply attributes to sections, rows, columns, modules, and buttons.
Enable Custom Attributes Extension
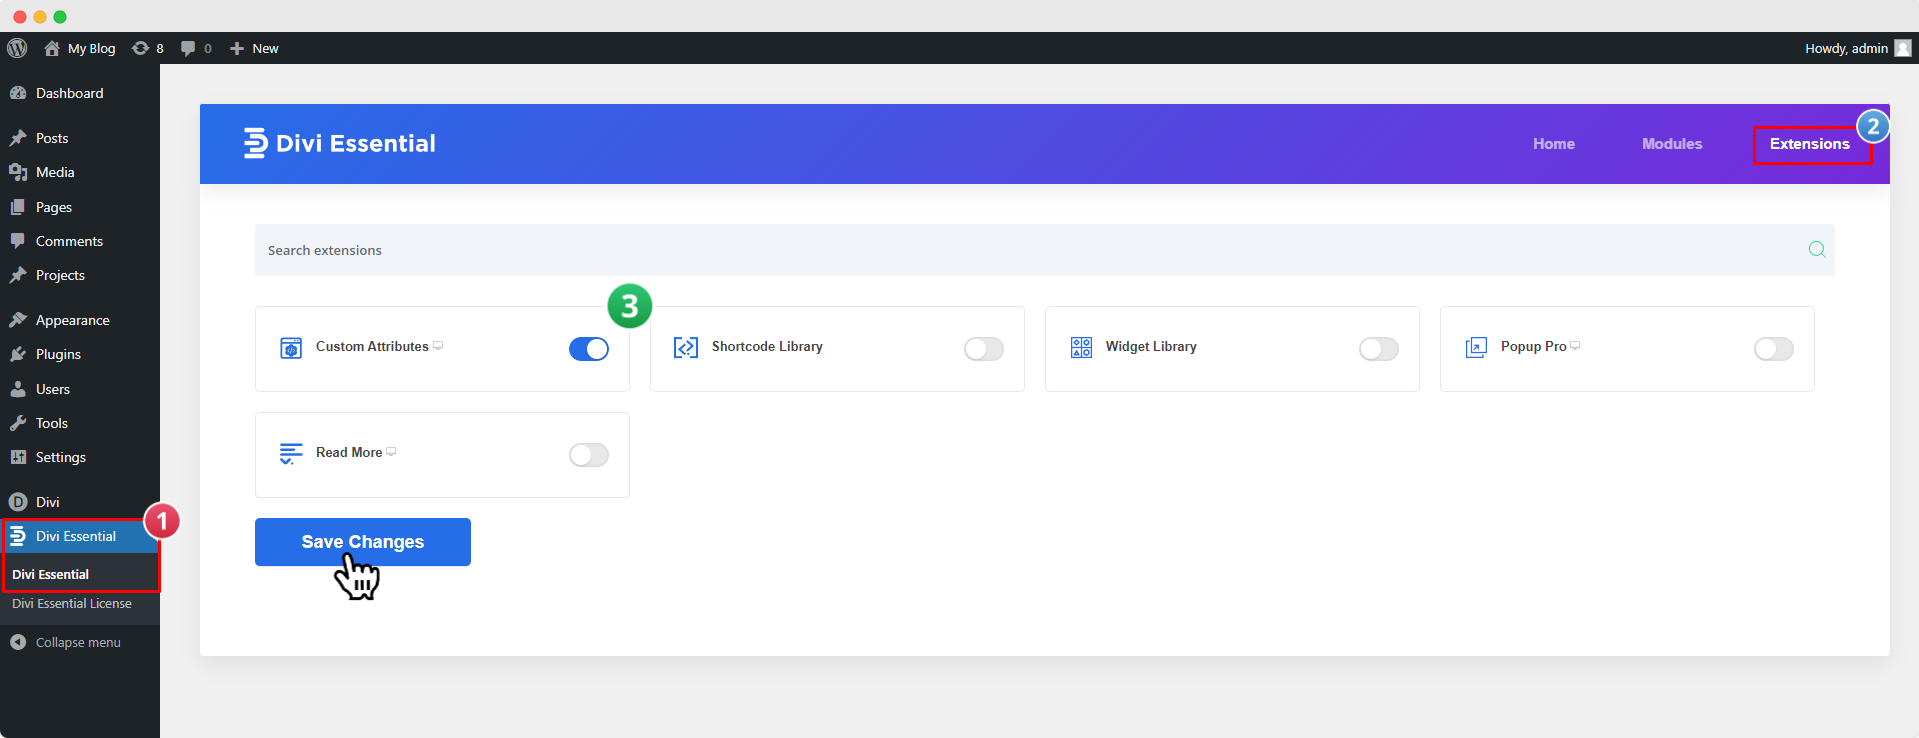
To use the “Custom Attributes” extension, you must first activate the Divi Essential Plugin. Once it’s activated, go to the “WP Dashboard > Divi Essential” and click on the “Extensions” button located in the top-right corner of the navigation bar.

Now, click the Read More “ON/OFF” switch to enable or disable the extension. Then click “Save Changes”.
Configuring Custom Attributes Extension
After enabling the “Custom Attributes” extension in the Divi Essential Dashboard, you can easily add any attribute to any section, row, or module. Follow the steps below to use the “Custom Attributes” extension.

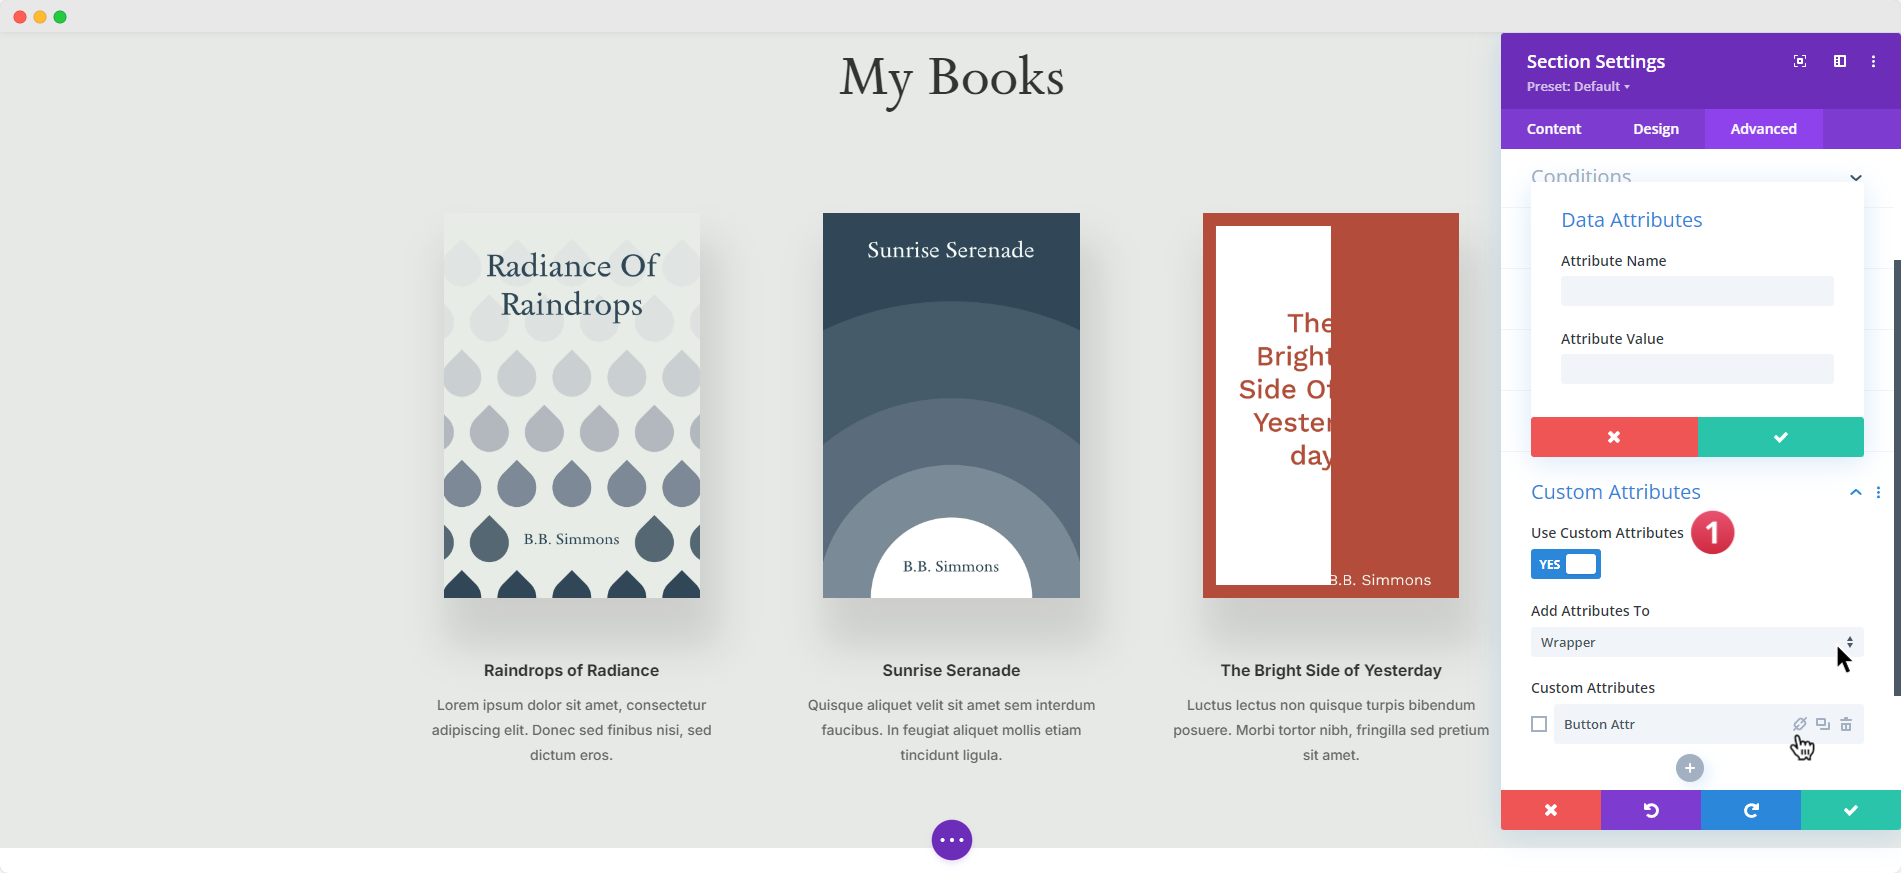
- Open the “Visual Builder” and Navigate to the settings of any Section, Row, Column, or Module.
- Go to the Advanced tab.
- Select Custom Attributes and enable “Use Custom Attributes.”
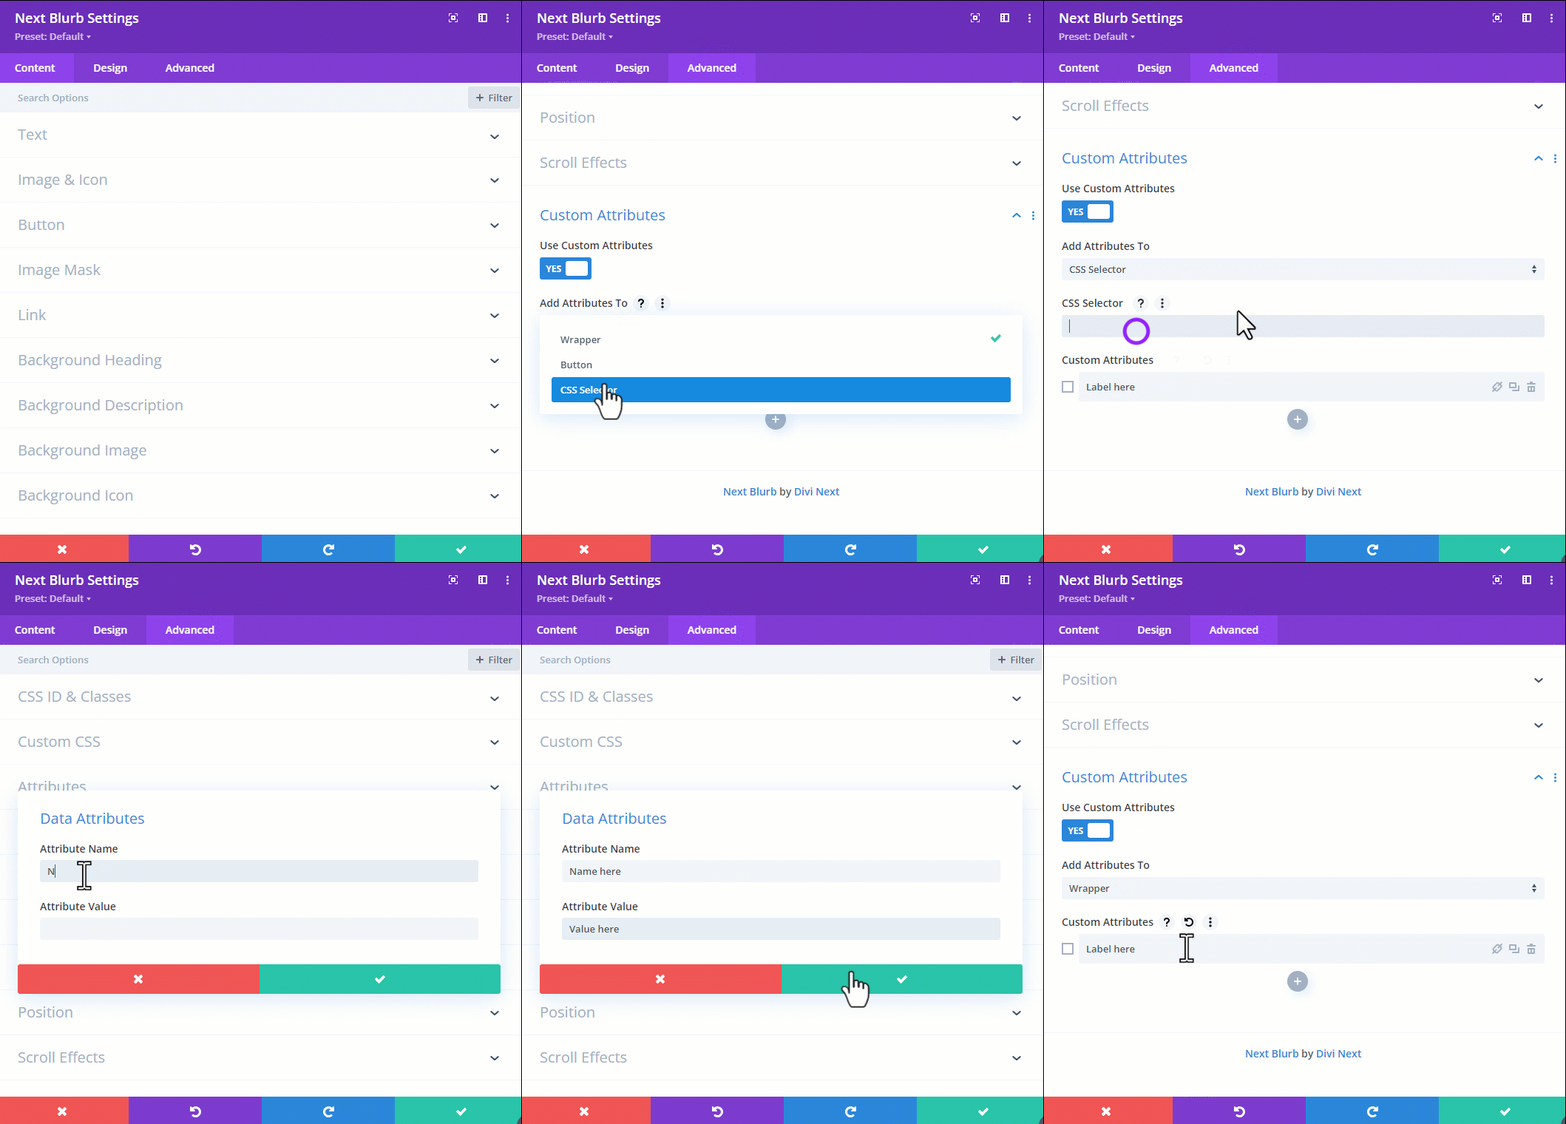
- Choose whether to add the attribute to the Wrapper, Button, or CSS Selector.
- Add a Title/Label to your attribute and click the check-mark to enable it.
- Click the “Link” icon (🔗) to add your attribute.
- A popup will appear where you can enter your Attribute Name and Value.
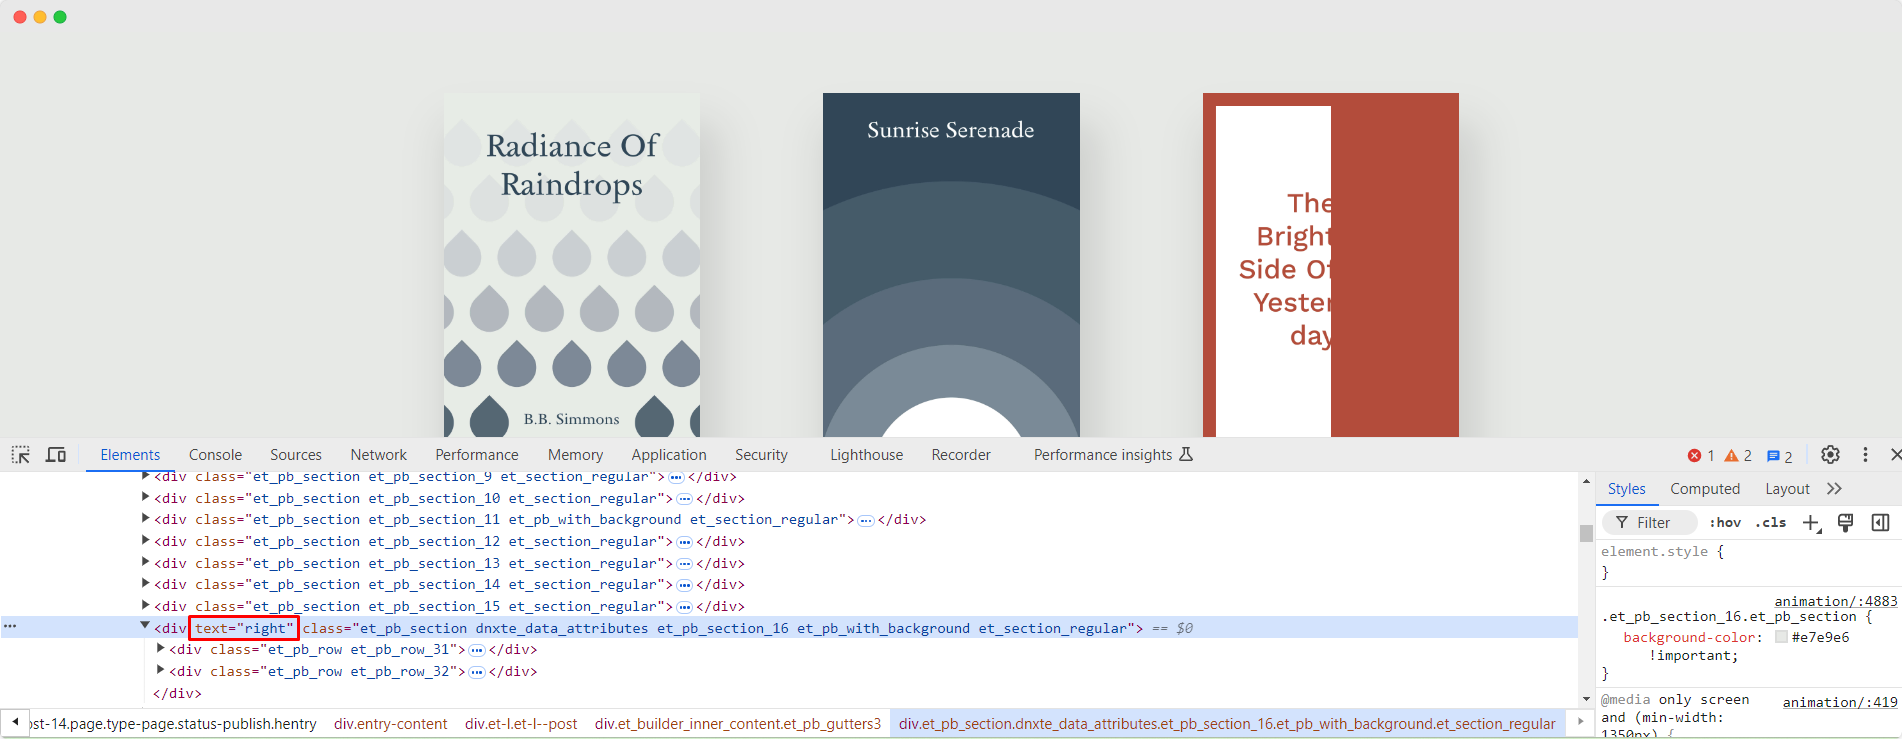
After adding attributes and saving the page, it will appear like below;

That’s all there is to it. If you wish to add more attributes, simply click the “➕” icon to add as many as needed. You can also watch the instructional video below;
